Website Content Management Resources
Note: Our updated service list, turnaround times & request form went into effect on March 18, 2024. Find details here & contact Kira Poplowski, chief communications officer, with your questions.
Orientation sessions are about 45 minutes and share a brief overview of the website project and how to start reviewing, editing and updating your content.*
2024
January 17, 11-11:45a
Register
March 20, 11-11:45a
Register
May 15, 11-11:45a
Register
July 10, 11-11:45a
Register
September 4, 11-11:45a
Register
October 30, 11-11:45a
Register
*As of January 2024, sessions are every two months. In 2023, sessions were once a week.
We can collaborate with you on assessing, deleting, adapting and creating content for your section[s] of the site. Please email Kira Poplowski, chief communications officer, to schedule.
Please note that we do not have a copyeditor and are unable to copyedit your text. To ensure accuracy, please use a free platform like Grammarly to check your text.
Here's a Q&A designed to help you think about your content:
1. What are my goals?
What do you want your content to accomplish? Is it to encourage an action, such as submitting an application, registering for an event or making a donation? Is it to share information, such as tuition, scholarship deadlines or faculty publications?
Clarifying your goals will help you review/adapt/create content that serves a specific purpose.
2. What are my audience's goals?
What you believe your audience needs to know may not be what they want to know.
Create a persona of your typical audience member and develop/organize content that’s most relevant for them, and link off to more detailed information. Users typically visit a website or page to find information and/or complete a task. Organize your page layouts and hierarchies so that the information users look for the most is also the most prominent. [It's probably not your mission statement.] We can share analytics that indicate how users have interacted with your content, which may provide insight.
3. Who is my main audience?
John Jay has several audiences: prospective students, current students, alums, etc. Who is the primary audience for your section[s] of the site? Keep their perspective in mind as you review/adapt/create your content.
4. What are my content needs?
Based on 1-4 above, what current site content can be reused, updated/adapted or created? It may be helpful to organize your content development along these lines to determine where you need to focus.
5. How do I write for the web?
People approach digital content differently from print.
Users spend an average of about 15 seconds on a webpage, even less on mobile, and they scan information instead of reading it. They search for things that stand out, like bullet points or lists. Keep it brief so readers can absorb it quickly.
Millions of other options are only a click or two away. To maintain interest, ensure that the information most pertinent information to your audience is also the most prominent.
6. Should I use ALL-CAPS to emphasize something?
No. Never use all-caps on a digital platform unless you're yelling at your audience. That is how all-caps are interpreted online. Instead of relying on all-caps, think about how your content could be rewritten or reorganized to make your point more clearly.
If all-caps are used, the web team will fix it.
7. What if I'm responsible for a department and/or degree program landing page?
Your department/degree program landing page is the "front door" to your section of the website and is likely to have much more traffic than your other pages. Your main audiences are prospective students and current students, so it's an opportunity to "advertise" as well as share information.
Both prospective students and current students will look for information that's relevant to them: content on what's distinctive about your program, what what they might learn/do if it's their major/minor or grad degree and the careers or more advanced degrees associated with it.
Current students will also visit your landing page to complete a task, such as finding advisement resources, course requirements, a faculty member's email, etc. Links to these items can appear on your landing page, but keep in mind that the resources mentioned in the paragraph above are of interest to both prospective students and majors/minors and should be more prominent.
Navigating a site is easier for users if page layouts are consistent across a site or section. The landing page format and content was reviewed by President Mason and reviewed and approved by Provost Pease. It applies to all departments/degree programs.
To make working on your landing page easier, the web team created a landing page with mostly dummy content for each department and degree program. The links can be found here.
Here's what's needed for your landing page:
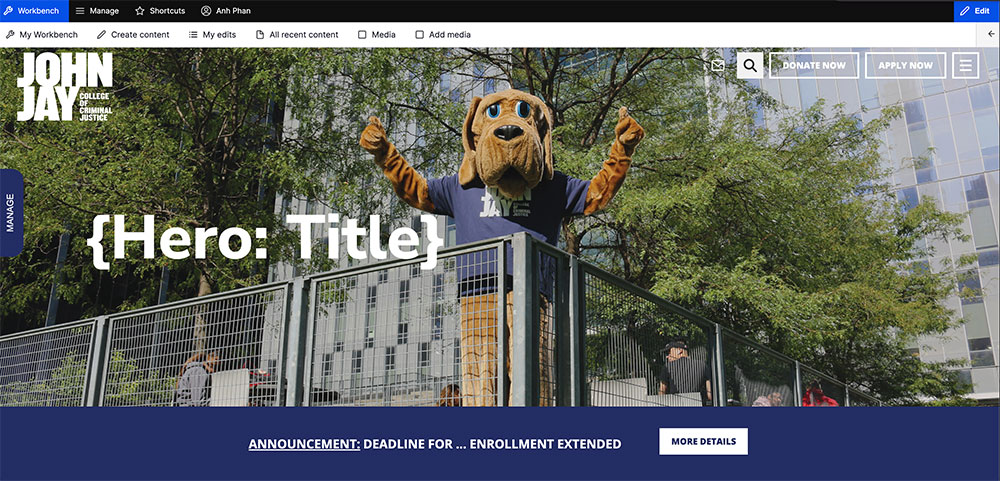
- Hero image: this is the large image at the top of the page. Select an image relevant to your program that does not compete with the text [[which is formatted "Department of [Name of Discipline]" or "[Name of Degree] in [Name of Discipline]].
- Icons/text: this appears below the hero image. You can choose the icons and the text that appears below the icons. At a glance, this section shares information that research shows is exceptionally important to prospective and current students.
- The text should be very brief [about 20 characters for the bolded text and about 60 for the unbolded text] yet impactful. Longer text will disrupt the layout, especially on mobile. We can work with you on this. You also have the option of adding a "Learn More" link so users can click for additional information.
- Highlights: this appears below the icons/text. This section showcases what's compelling about your program for both current and prospective students and aligns with an important strategic goal: student recruitment and retention. The only fixed item in this section is the link to Admissions on the far right. For the others, you can choose the links, images and very brief subtitles and descriptions. This might include:
- link to success stories about student/alum majors
- link to internships related to the major/minor
- link to info on career paths
- link to scholarships & fellowships related to the major/minor
- link to new or interesting courses offered by the department
- link to news and/or events
- Resources: this appears below the highlights section. This is the spot for links to task-oriented links, like advising resources, major/minor requirements, faculty contact info, etc. This might include:
- link to major/minor requirements
- link to advisement resources
- link to FAQ
- link to faculty profiles/contact info
- link to staff contact info
- Optional section: this appears below the resource section. It allows you to link to more content if necessary and delete if not. You can choose the image, subtitles and links. If the format doesn't work well with your optional content, please contact Kira Poplowski to discuss options.
- Contact us: this appears below the optional section. Users expect to scroll to the bottom of a page to find it, so it should remain there. Keep the content brief: one department email address, one department phone number and one department location.
When your page[s] are finalized, please indicate that they're ready for review by adding "yes" to column E on tab 4 here.
Logging In, Your Workbench & the Media Library, with Chandeep Khosa, Web Developer
Creating & Editing a Content Page, with Chandeep Khosa, Web Developer
Editing a Content Page: Intermediate, with Chandeep Khosa, Web Developer
Content Blocks - Your Options, with Chandeep Khosa, Web Developer
Moving Content Blocks, with Chandeep Khosa, Web Developer
Creating & Editing a Landing Page, with Chandeep Khosa, Web Developer
Click here to log in. Use your John Jay credentials to log in and click "Single Sign-On." Contact Anh Phan if you need assistance.
Once logged in, click Workbench to select an action:

My Workbench (to see YOUR recent edits)
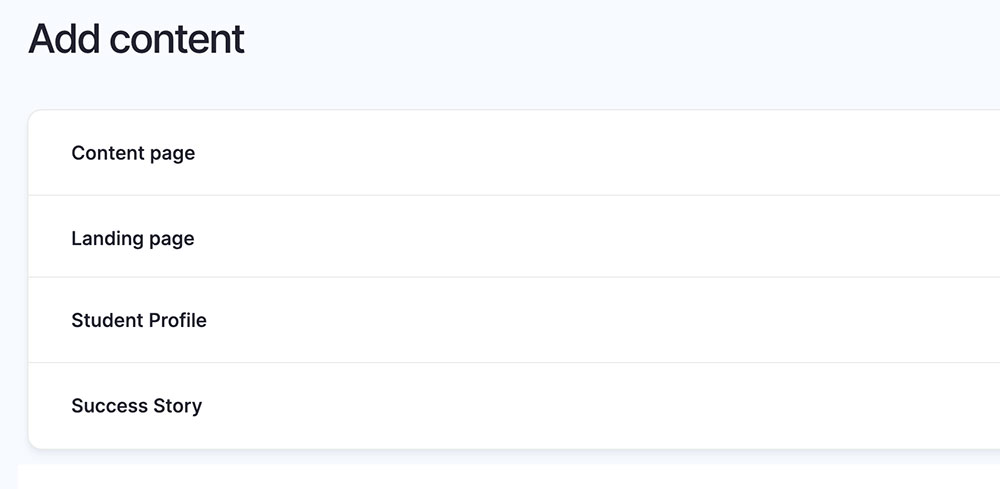
Create content (to create a new page)
My edits (to see the pages you created/edited)
All recent content (to see ALL recent editedvcontent)
Media (to view and access the Media Library to upload/select images and files)
Add Media (to add images and files to the Media Library)
To create a page, click Create content.
Log in to the site, click "Workbench" on the upper left of your screen then "My Workbench." Your content should appear below. Click on the link to the page you want to edit. If your content does not appear, click on "All recent content" and search by URL keywords. Please contact Anh Phan if you need assistance.
Most of the pages on our site are Content Pages. Content Pages use a standard template and should be simple and straightforward with little to no customization of the template.
While Content Pages can be Landing Pages, they're typically child pages with a hierarchical relationship to a Landing Page, ie parent page. For example, the Tours & Events child page is a child page of the Undergraduate Admissions parent page. For more detailed info on this, see Create a Landing [Parent] Page below.
To create a Content Page, select Content Page in your Workbench. To add content to the page, select Edit Content on the Manage tab on the left. Most Content Pages primarily use Text Blocks and sometimes Accordion and Table Blocks.
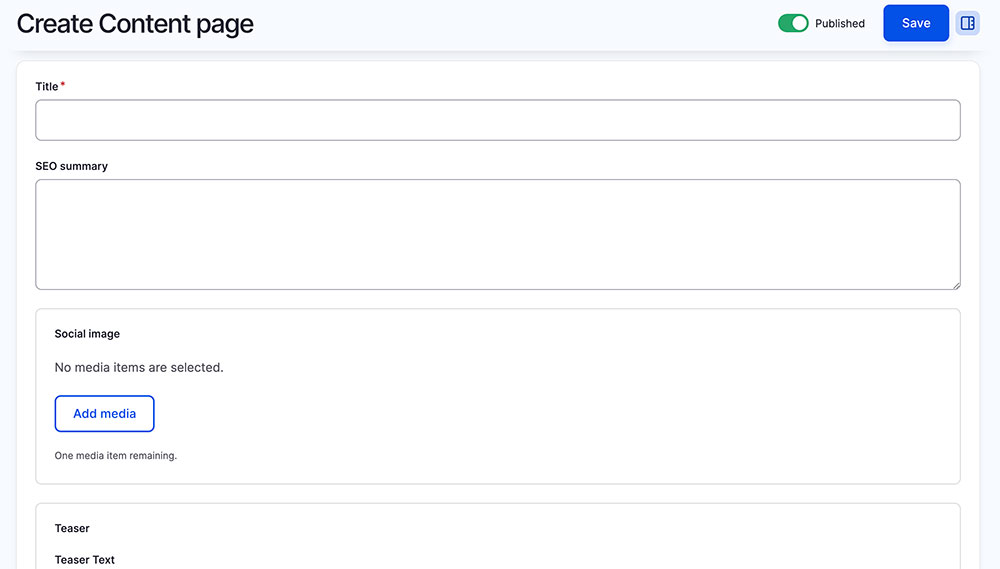
Title: Title of the page, e.g. Admissions
SEO Summary: SEO Summaries are important and must be added to every page. See Creating an SEO Summary below.
Teaser: Leave blank for now.
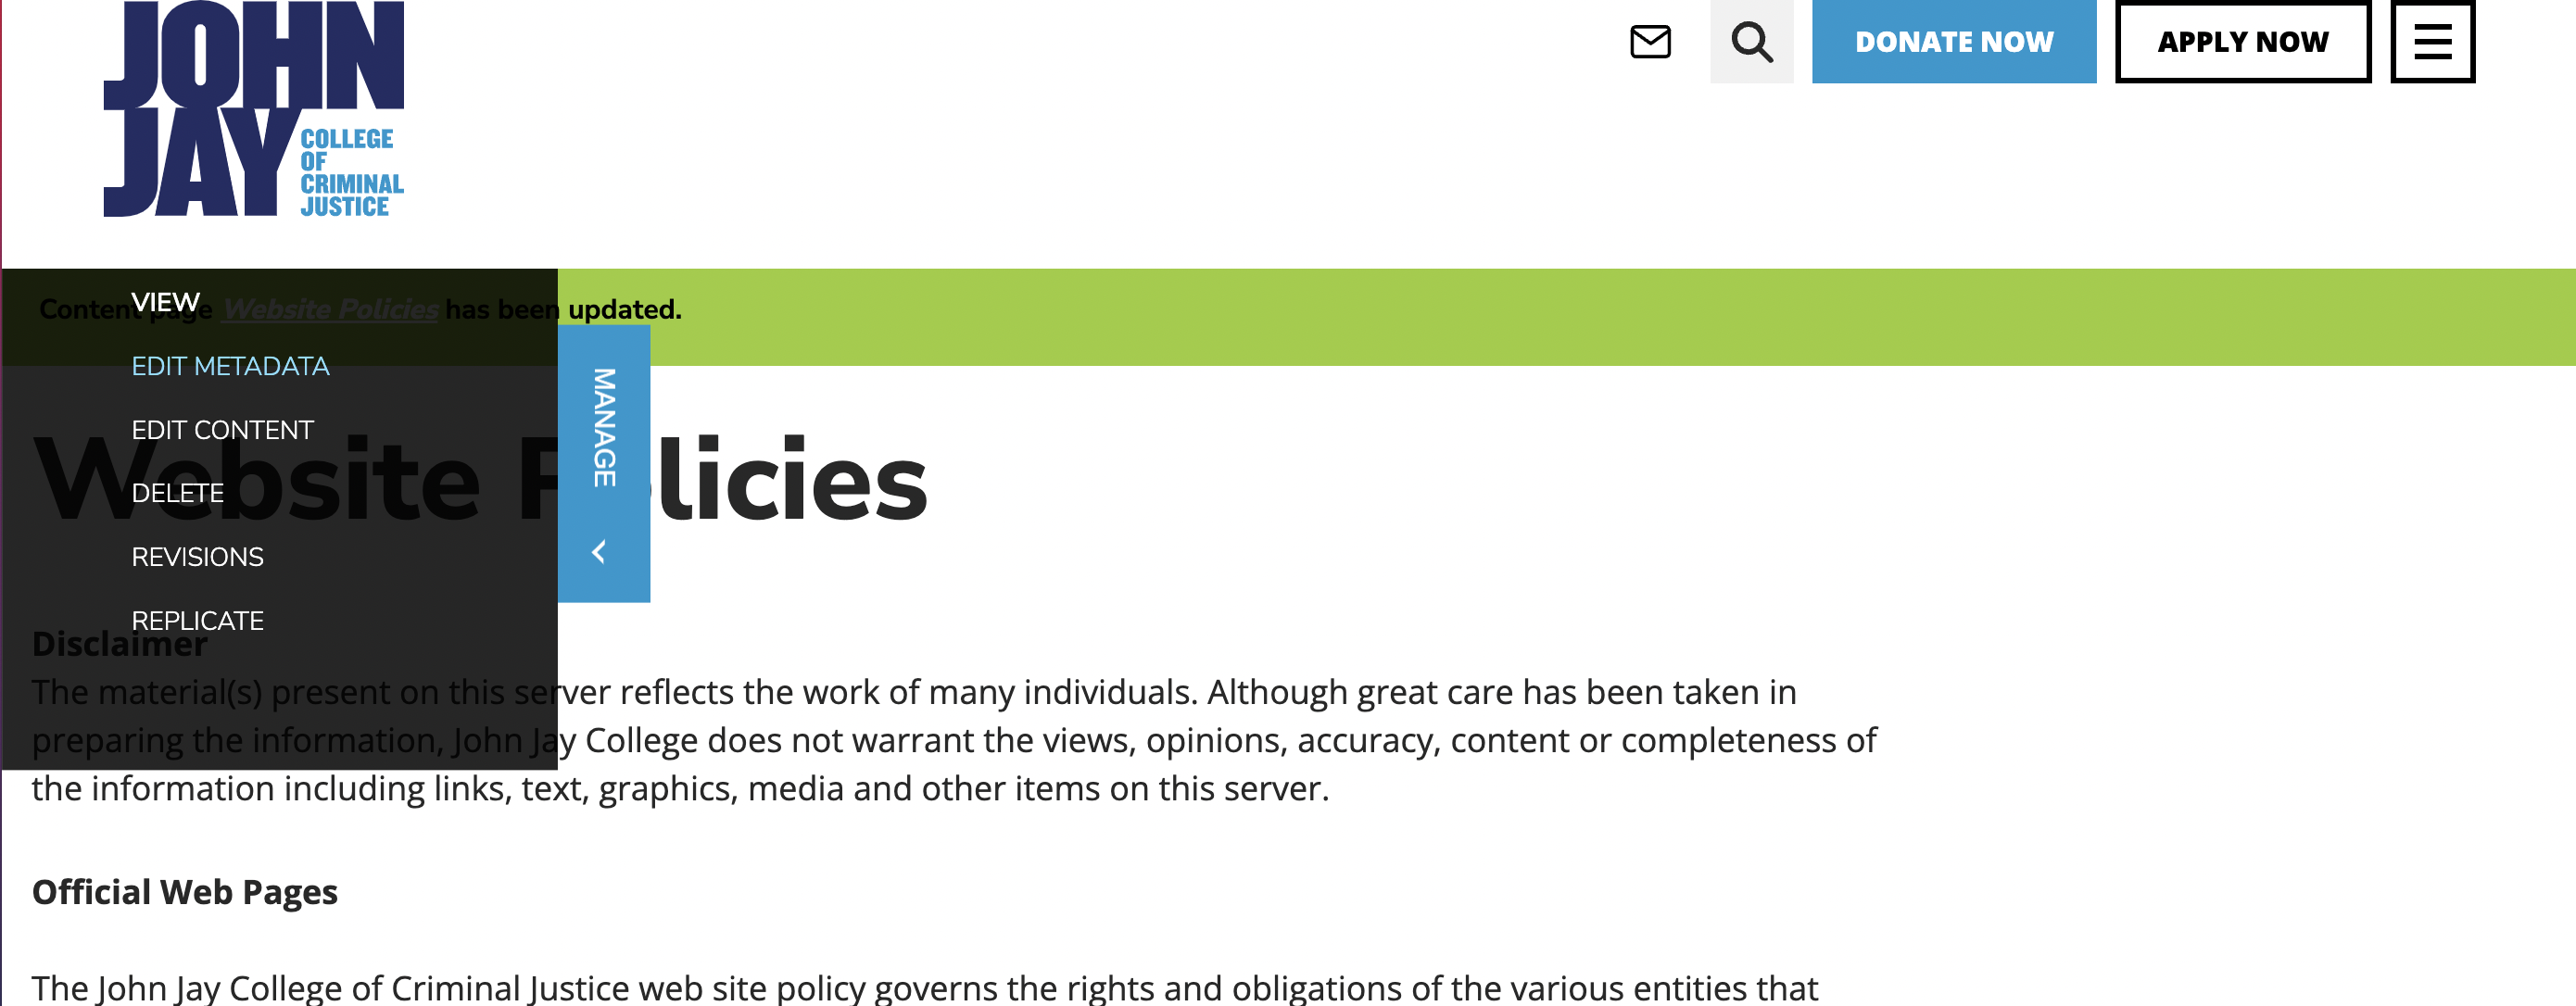
To edit a content page, click the Manage tab on the left of the screen, then click Edit Content.
Pages are built using content blocks, indicated by the circled pencil on the right. To edit content, scroll to the content block you want to edit and click on the pencil on the upper right. Select Configure.
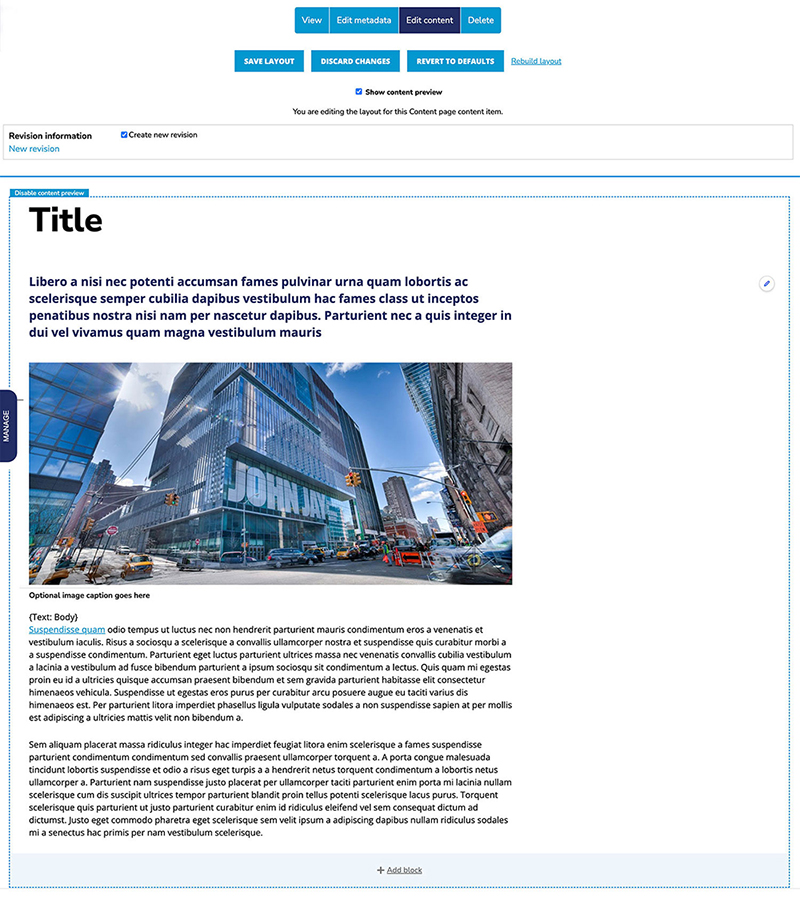
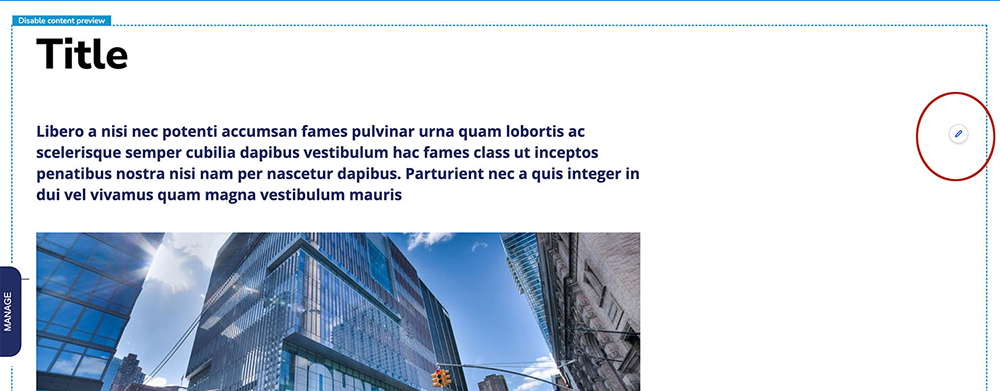
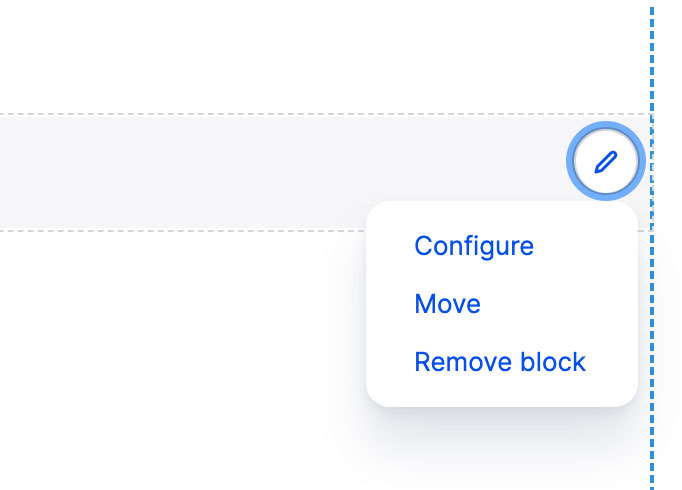
Select Configure to edit content of the block.
Select Move to move blocks in different order.
Select Remove Block to delete block. This cannot be undone.
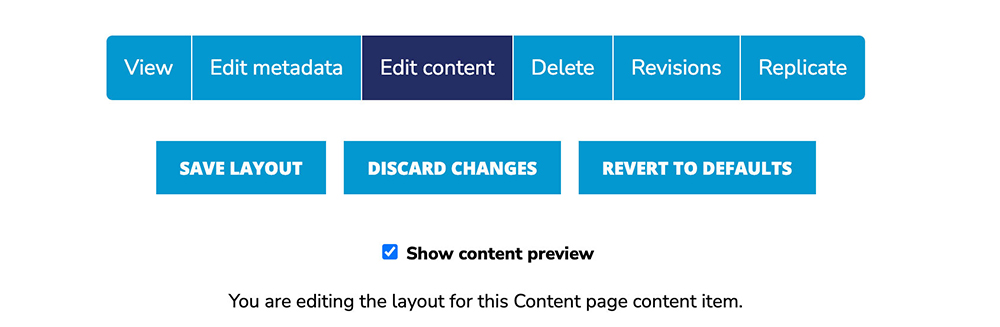
When your edits to the content block are complete, scroll to the bottom of the content block and click Update. Then scroll to the top of the page and
Select Save Layout if you're happy with your changes and want to publish them.
Select Discard Changes if you want to revert to the original page. Your edits will not be saved.
Do not click Revert to Defaults.
Use a landing page when you want to provide a high-level overview of department/unit content. Landing pages are typically "parent" pages with hierarchical relationships to their "child" pages.
For example, the Academics department has a landing page with associated child pages such as Undergraduate Programs, Graduate Programs and Certificates.
To create a landing page, click Create content in Your Workbench and select Create Landing Page.
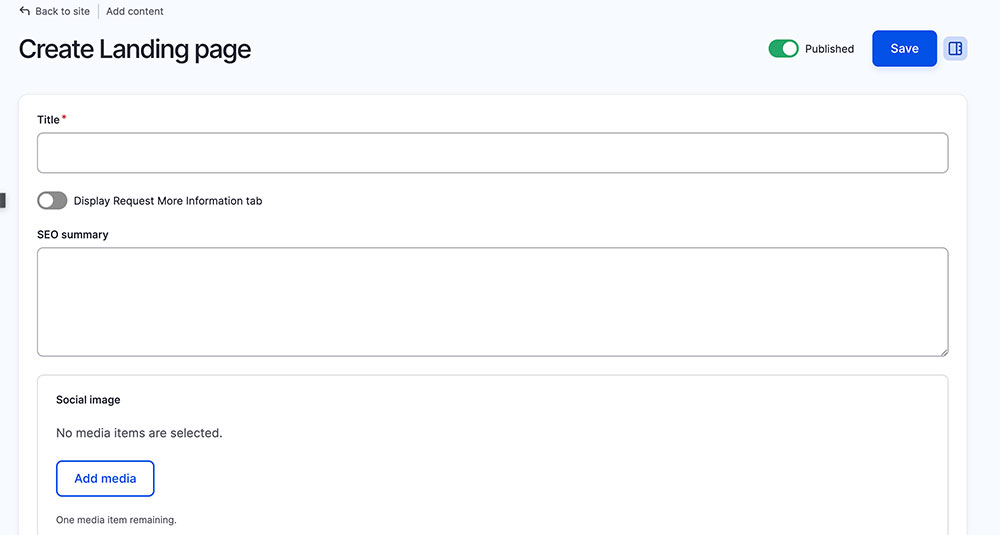
Add the title of your page and an SEO Summary. SEO Summaries are important. In search results, they provide users with a brief description of the content of a page, which can determine whether or not a user clicks on a page. See Creating an SEO Summary below for more details.
Once you create the page, a Landing Page with dummy content will appear. To edit the content, click Manage, then Edit Content.
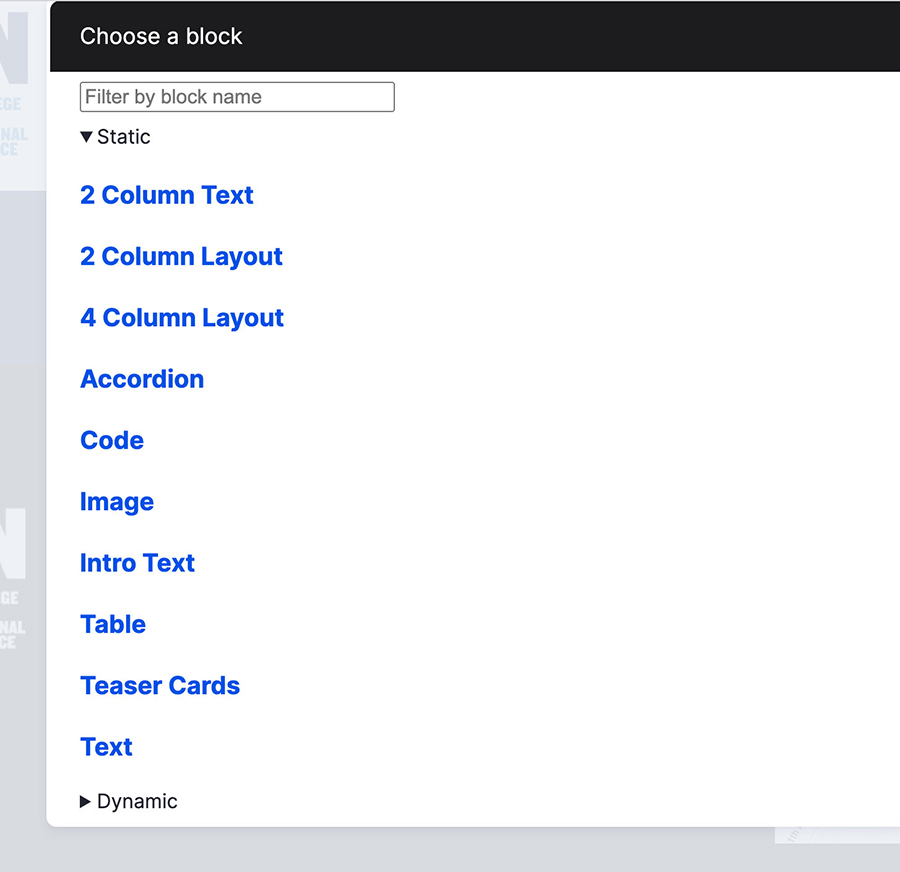
To add content to the page, click Add block at the bottom of the page, then select content blocks that are the best fit for your content. Take a look at the other landing pages in your part of the site or elsewhere on the site. Your landing page should be very similar to those. Users look for patterns & consistency when they navigate a site. Variation makes it more challenging for users to find what they need. We can help you organize your landing page.
Click here to see what each Content Block looks like and how each should be used.

When you're finished, scroll to the top of the page.
Select Save Layout if you're happy with your changes and want to publish them.
Select Discard Changes if you want to revert to the original page. Your edits will not be saved.
Do not click Revert to Defaults.
Please note: Faculty profiles are tied to John Jay's identity management system. Only faculty members and the web team can edit or create a faculty profile.
If you had a profile on the old website, it was migrated to the new website. If you're not sure, please check by navigating to your department homepage, scrolling until the Navigation tab appears on the left side of the screen and clicking "Faculty."
To edit an existing profile:
- Click on this link: https://www.jjay.cuny.edu/user/login
- Enter your John Jay credentials [email & password]
- Click "Single Sign-On"
- Wait for a confirmation email [typically within two working days] and follow the instructions on how to edit your existing profile. Please do not create a new profile. Creating a new profile instead of editing an existing profile will create a duplicate profile.
If you did not have a profile on the old website, you can create one. To create a new profile:
- Click on this link: https://new.jjay.cuny.edu/user/login
- Enter your John Jay credentials [email & password]
- Click "Single Sign-On" and follow the prompts
- Click "Workbench" on upper left
- Click "Create content"
- Click "Faculty Profile"
- Add content to your profile page
- When you're finished, scroll to the bottom of the page and click "Save"
Please contact Anh Phan if you need assistance.
Each web page consists of content blocks, which provide different ways to present and organize content. Click here to see what each content block looks like and learn how each is designed to be used.
Take a look at the other pages in your part of the site or elsewhere on the site. Your pages should be very similar to those. Users look for patterns & consistency when they navigate a site. Variation makes it more challenging for users to find what they need.
To add content to the page, click Manage, then Edit Content, then Add block at the bottom of the page. Select a content block[s] that are the best fit for your content. Add the content required, scroll to the bottom of the content block and click Update. Check your work and if it's correct, scroll to the top of the page and click Save Layout.
To move content blocks up or down the page, click the pencil on the content block you'd like to move and select Move. The content being moved is labeled (current). Drag and drop the content block to its new location.
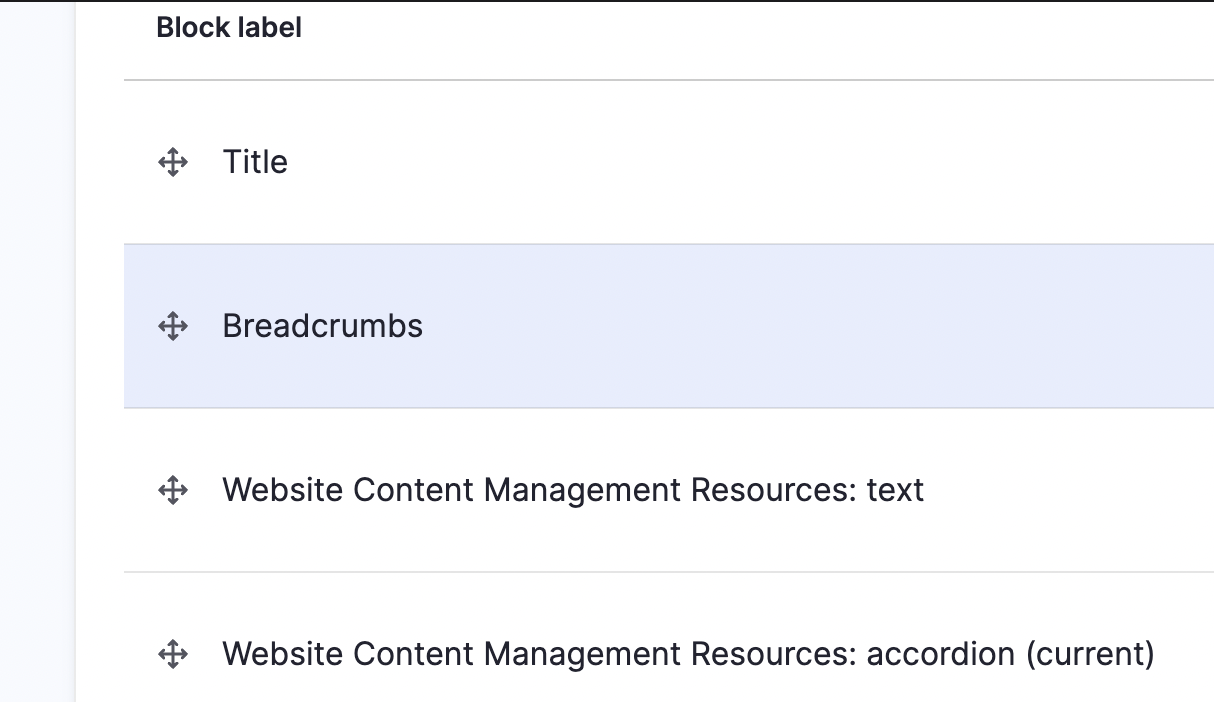
Click Move when you're done. Check your work and if it looks good, scroll to the top of the page and click Save Layout.
Please send your event details to Anh Phan and we'll add it to the events calendar.
You can upload images to the Media Library by clicking Add Media in Your Workbench or by selecting an image or file already in the Media Library. We typically use candid photos, not graphics or posed photos, which enhances the authenticity and verisimilitude of our content. Please use candid photos whenever possible.
It's imperative that we do not use images that are copyright-protected. Many images found online are copyright-protected. We have an account with Shutterstock that allows us to use their images. Search the site for an image and send the image ID number to Anh Phan at aphan@jjay.cuny.edu. We'll download it for you.
If you upload an image to the Media Library, you will be asked to name your image. Use "Who-What-Where" as the naming convention, e.g. "Students-Studying-Jaywalk." This will help editors find images more easily.
Do not upload files over 1MB. If possible, resize before uploading. If you can't, please contact Anh Phan, aphan@jjay.cuny.edu for more assistance.
Linking to PDFs is not best practice and should be avoided. Instead of linking to a PDF, create a web page or web form. Do not use PDFs for digital content that could and should be a web page or web form. For help creating a web form, please contact Anh Phan.
Here are a few reasons why PDFs are a problem.
1. They're not mobile-friendly.
Half of John Jay users access the site via mobile. PDFs were created for desktop printing 30 years ago. They are not responsive and require pinching, zooming and two-way scrolling. Text and links are too small and images and graphics difficult to understand.
2. They're not very accessible.
PDFs present challenges for users with disabilities and require several steps to make them accessible including creating bookmarks and headings to convey structure and allow people who use screen readers to scroll to the information they need, tagging tables so they can be read correctly by assistive technology, adding alt text to images and more. PDFs can still be difficult for users even with these adjustments.
3. Users hate them.
PDFs remove users from the familiar context of a website and to a different platform with different and usually unfamiliar navigation. They lose access to all site navigation and context. PDFs usually load more slowly and often need to be downloaded and saved to use.
4. They're harder for users to find.
A significant amount of traffic is directed to web pages via search engines instead of site navigation. Because PDFs don't have structured data, usually load slowly and aren't optimized for mobile, they don't rank well in search results. The same content in HTML will usually perform better in search, meaning it's more likely your audience will find it.
5. They're almost impossible to keep up to date.
When information or a link in a PDF changes, the PDF has to be deleted and replaced with a new PDF with a new URL. Content editors frequently forget to update PDFs and almost always forget to replace old URLs with new ones. Websites become littered with out-of-date PDFs and broken links.
6. PDF forms are cumbersome and have minimal functionality.
PDF forms require downloading, saving, completing, attaching to an email or printing, annoying most users. Web forms are more accessible, user-friendly and easier to navigate. Please email Anh Phan for assistance with creating a web form.
Most pages will have child pages. For example, Admissions is a parent/landing page and has two child pages: Undergraduate Admissions and Graduate Admissions.
When your parent and child pages are finalized, please contact Anh Phan who will create the hierarchy between parent and child pages and establish the navigation.
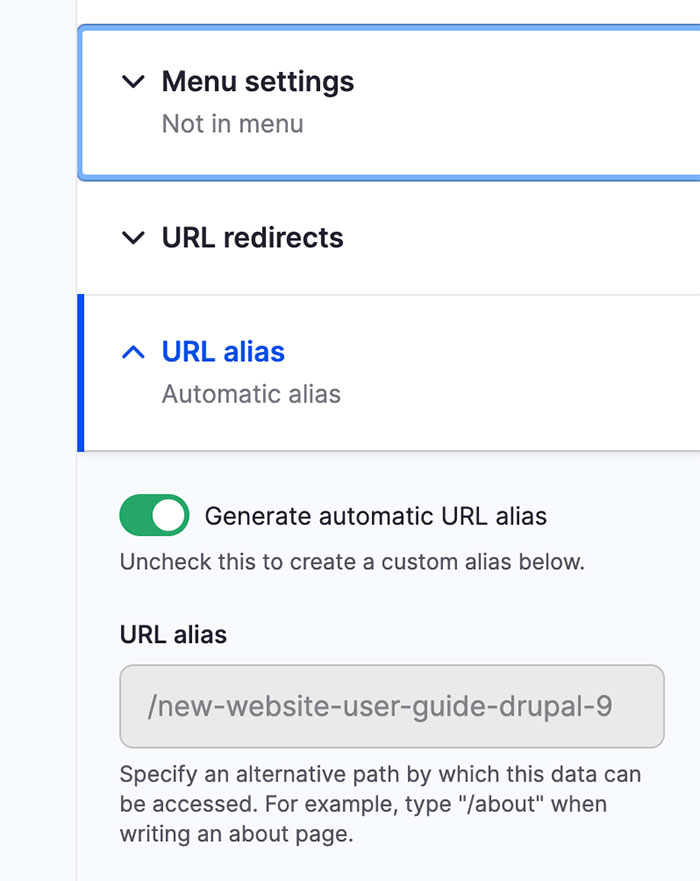
When a page is created, an automated URL is created based on the title of the page. If it is unique, no need to change it.
If it is an About Us page and there are already other About Us pages, the system will automatically generate an URL like this "www.jjay.cuny.edu/about-us-20". This URL does not tell users (and search engines) much information. Rename the URL to something like ".../about-admissions" to make it more intuitive for users.
To customize the URL, click on Edit Metadata, uncheck "Generate Automatic URL Alias" and type the new name into the URL Alias field.
Left-hand navigation is automatically applied to parent pages [see #19, Creating Parent/Child Page Relationships]
If you prefer not to include a left-hand navigation on your page:
1. Click the Manage tab.
2. Click Edit Metadata.
3. Click on the Hide the Left-Hand Navigation toggle button under the Title field.
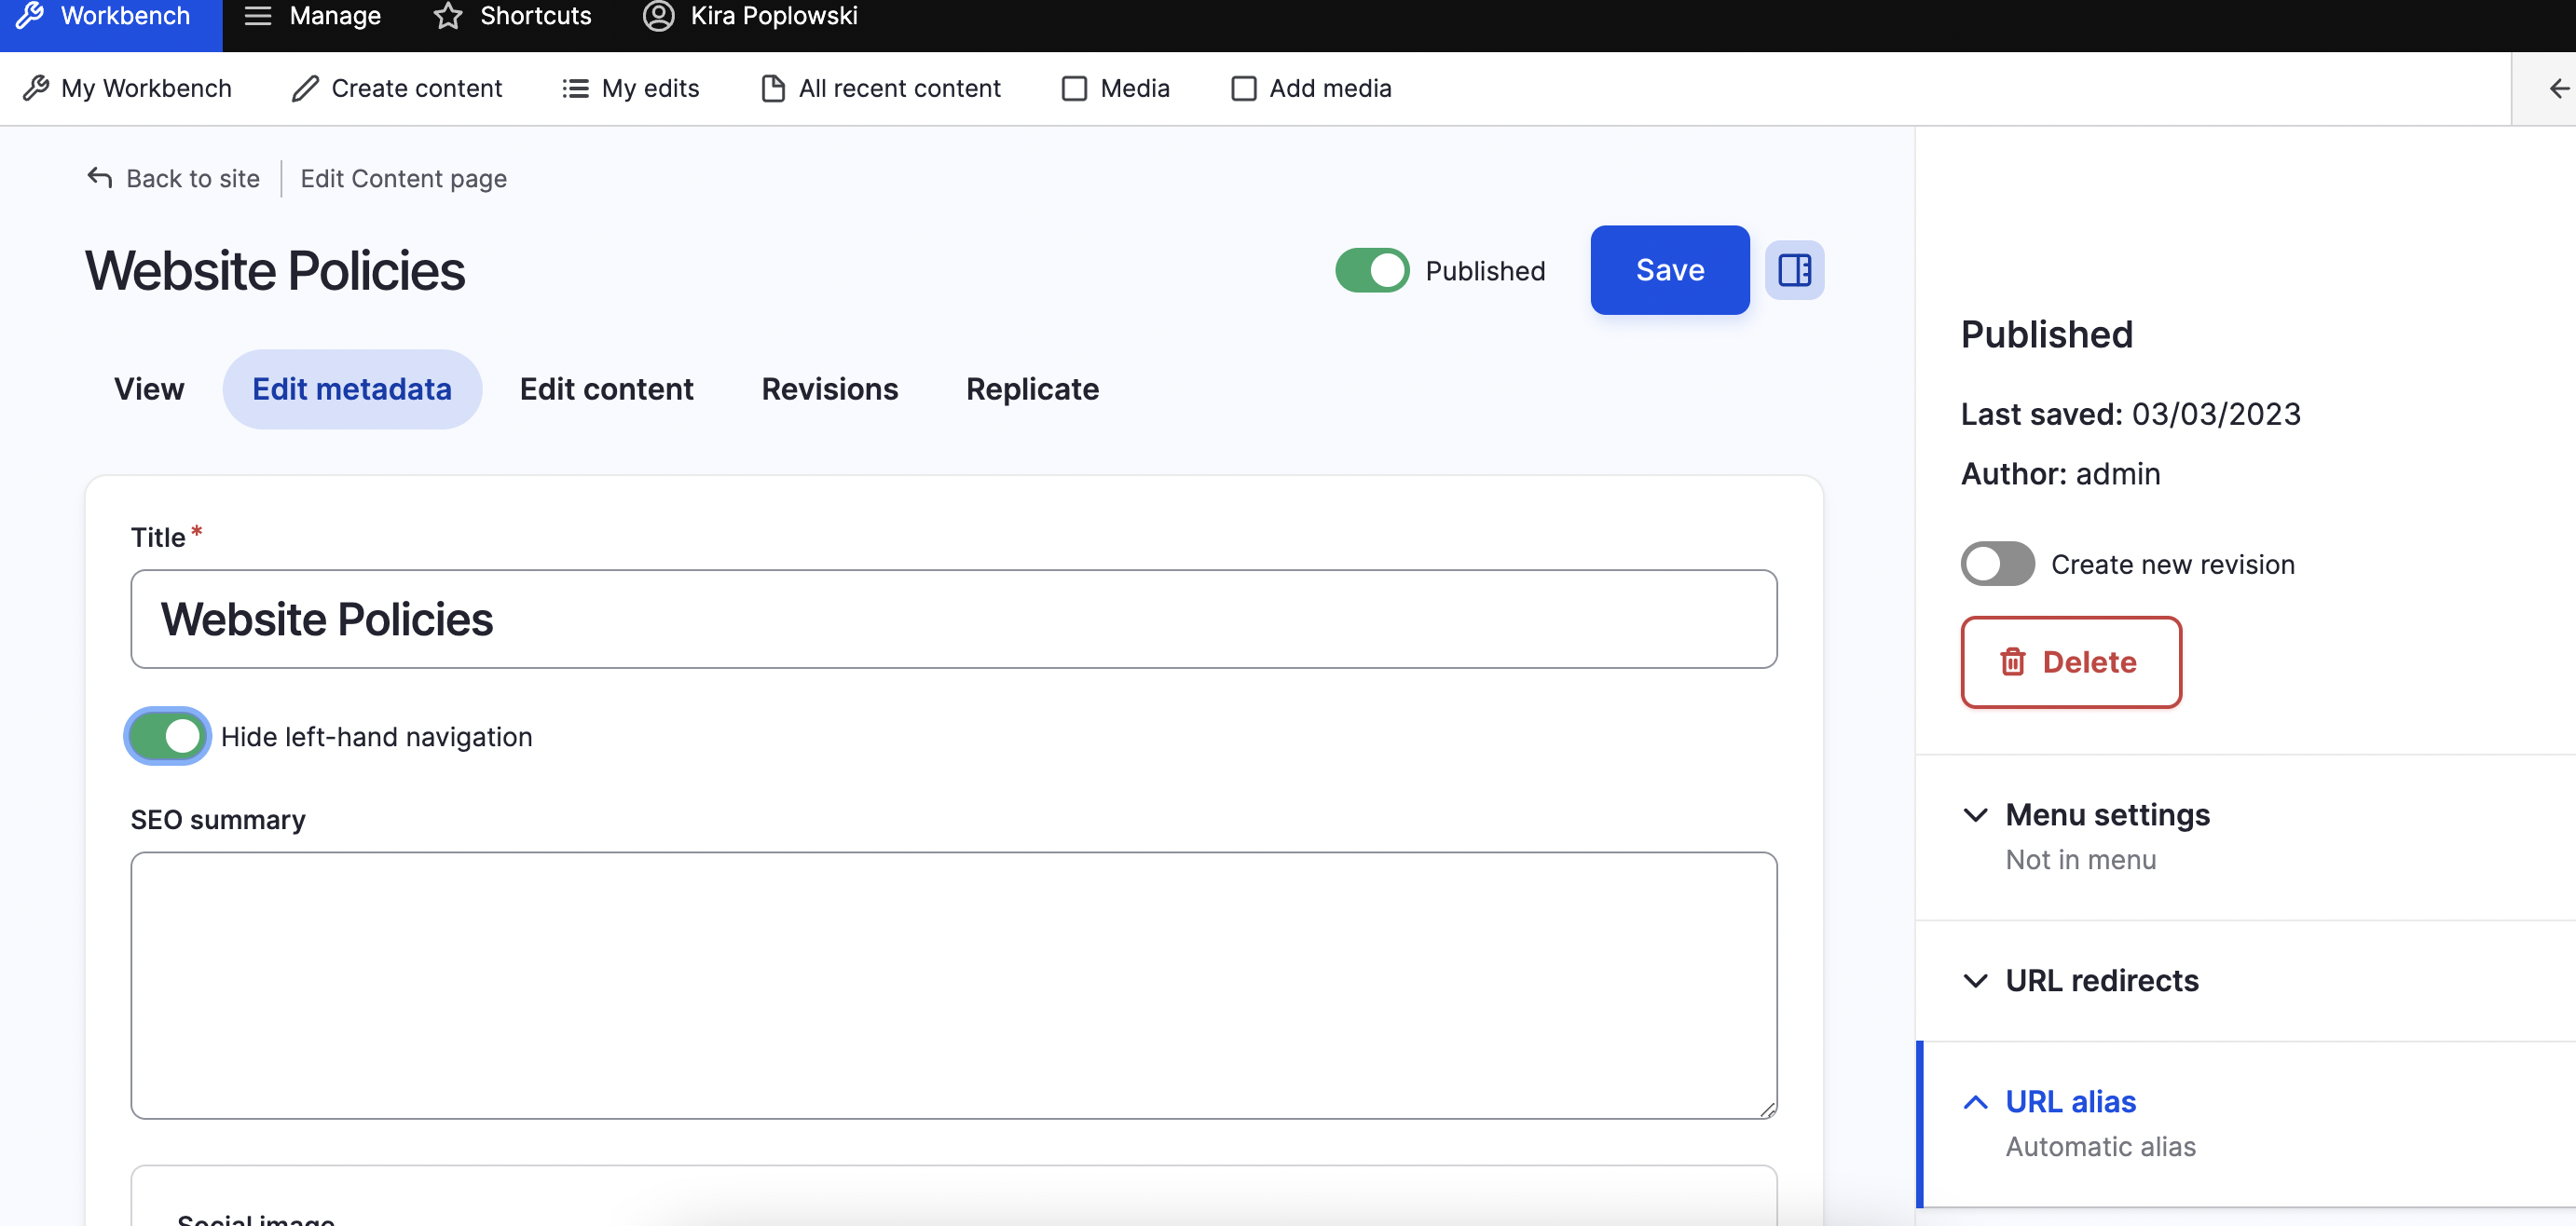
4. Move the toggle to the left.
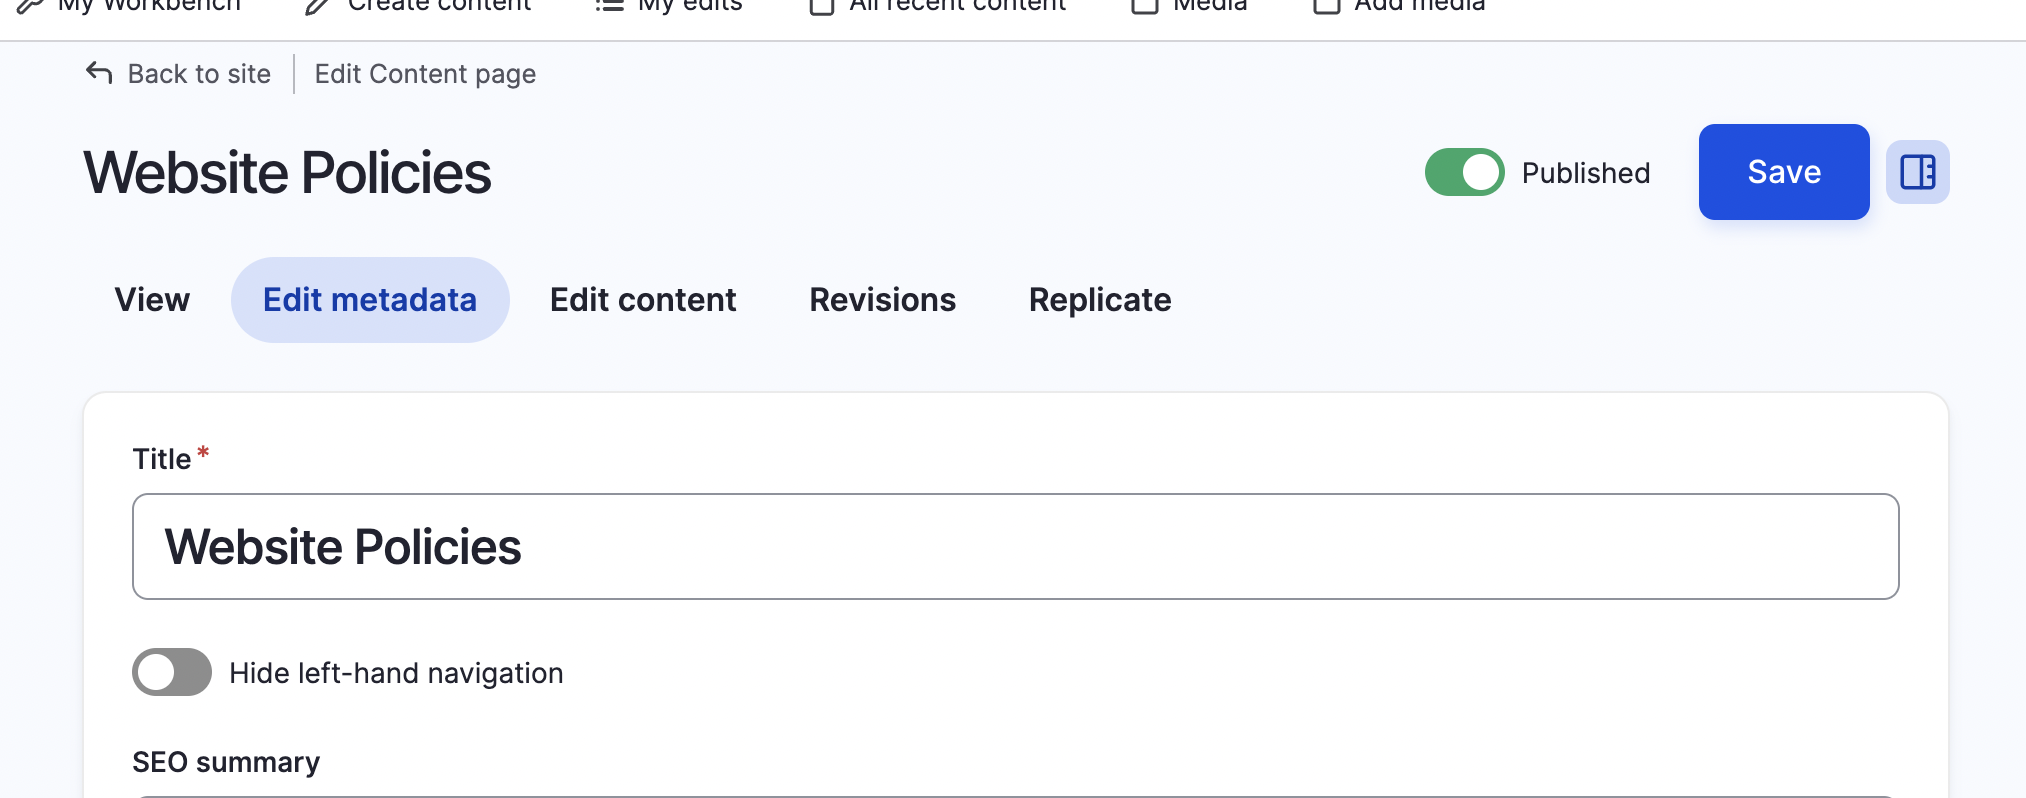
5. Click Save on the upper right corner of the page.
To edit your left-hand navigation:
1. Click the Manage tab.
2. Click Edit Metadata.
3. On the right, scroll to Menu Settings and toggle Provide a menu link.
4. Under Parent link, click to display the drop-down menu.
5. Click on the Parent or child link to which the page should be assigned.
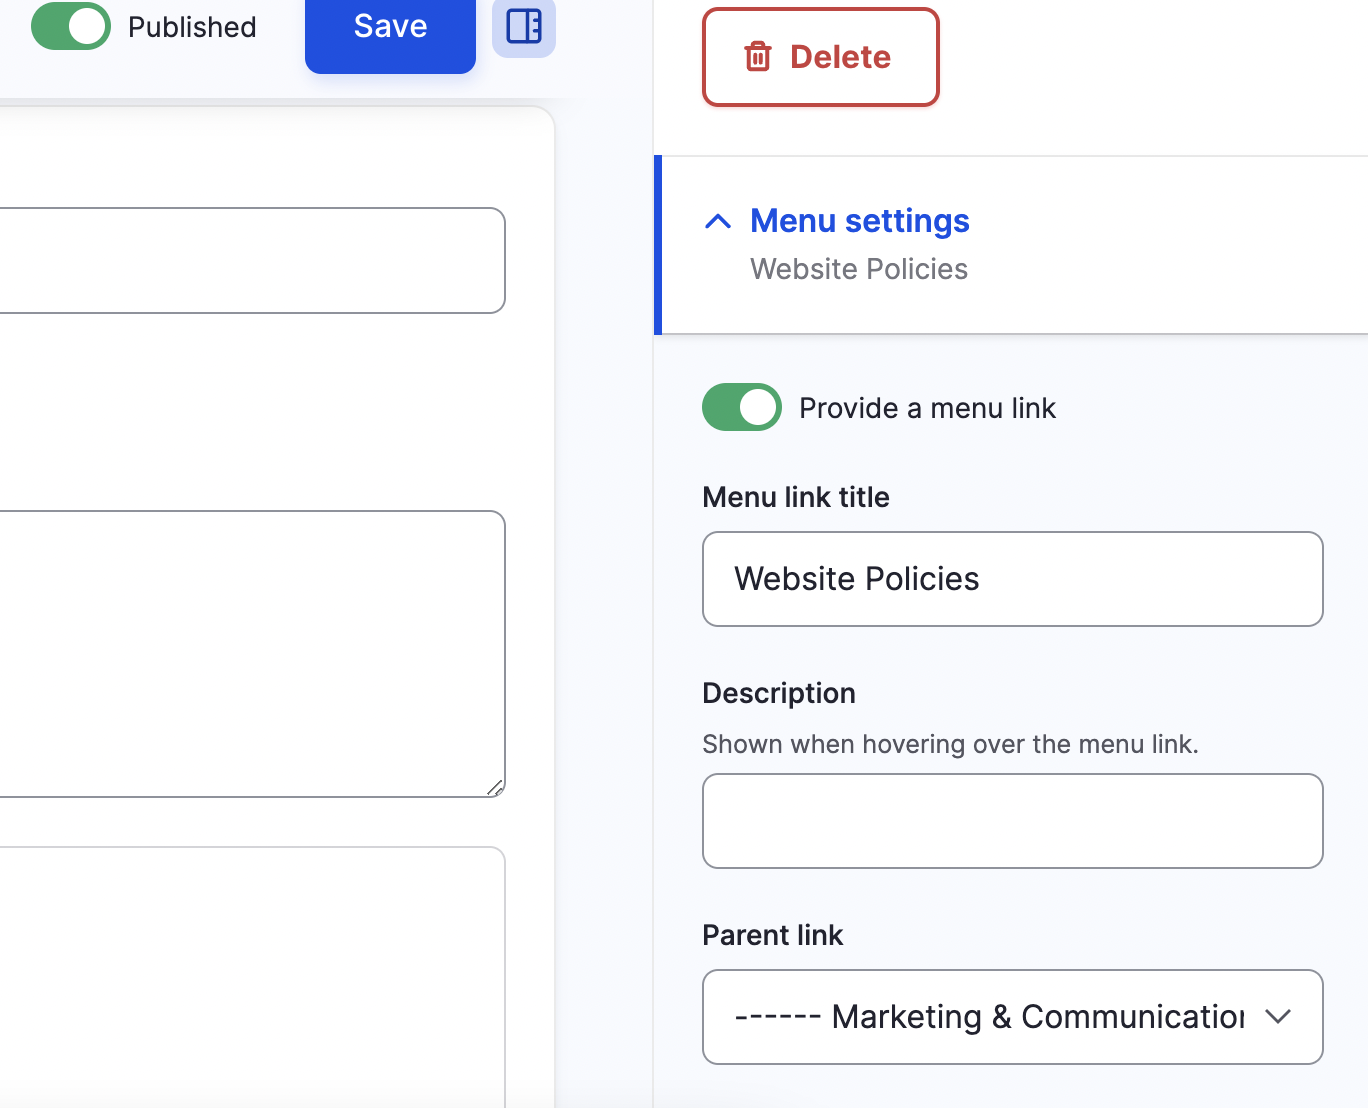
6. Click Save.
Pls contact Kira Poplowski or Anh Phan for assistance
An SEO [search engine optimization] summary, or meta description, is a brief description [120-150 characters] of the content of a webpage that is often displayed in search engine results. The description should let users know what they’ll find on the page and encourage them to click. Search engines typically display a page description below its URL & title.
These descriptions do not directly affect how a search engine ranks search results. However, they can convince users to click on your link, which can have a positive effect on SEO.
To add an SEO summary to a page, click Edit Metadata in the Manage tab.
Scroll to the SEO Summary field and add a summary of page contents in about 155 characters.

Click Save at the top of the page.
Most of the pages on our site are Content [or child] Pages with a hierarchical relationship to a Landing [or parent] Page. Creating these relationships between pages establishes the overall organization of the site and automatically generates both the page breadcrumbs and left-hand navigation items.
When your parent and child pages are finalized, please contact Anh Phan to discuss the relationship between your pages. She will then create the navigation.
Teaser Cards display a summary of content from four other pages of the site on the page you're creating or editing. They're a great way to share four pages or sections of information at-a-glance in an organized way.
To add a Teaser Block to your page, click Manage then Edit Content. Scroll to the bottom of the page and click Add block. Under Teaser blocks, select Teaser Cards. Type in the title of the block.
For the first teaser card, select an image from the media library, then type in the title of the card [teaser title]. The title should be no more than 15 characters.
If you're linking to a page on the John Jay site, scroll to Internal link. Start typing the name of the page and the full page name should appear below. Click on it. If you're linking to a page not on the John Jay site, scroll to External link and paste in the URL.
Under Teaser text, add a very brief (no more than 75 characters) description of the content on the page to which you're linking.
To add the next teaser card, click on Add Teaser Card and repeat the steps above. When you've added all four teaser cards, click Update. Check your work. If you don't have any changes, scroll to the top of the page and click Save Layout.
What's a landing page and why is it important?
Your department/degree program landing page is the "front door" to your section of the website and is likely to have much more traffic than your other pages. Your main audiences are prospective students and current students, so it's an opportunity to "advertise" as well as share information.
Both prospective students and current students will look for information that's relevant to them: what's distinctive about your program, what they might learn/do if it's their major/minor or grad degree and what careers or more advanced degrees are associated with it.
Current students will also visit your landing page to complete a task, such as finding advisement resources, course requirements, a faculty member's email, etc. Links to these items can appear on your landing page, but keep in mind that the resources mentioned in the paragraph above are of interest to both prospective students and current students and should be more prominent.
How are department/degree program landing pages organized?
Navigating a site is easier for users if page layouts are consistent across a site or section. The landing page format and content was reviewed by President Mason and reviewed and approved by Provost Pease. It applies to all departments/degree programs.
To make working on your landing page easier, the web team created a landing page with mostly dummy content for each department and degree program. The links can be found here.
What do I need to do?
Please review the training videos and user guide above before starting.
Here's what's needed for your landing page:
- Hero image: this is the large image at the top of the page. Use an image relevant to your program that does not compete with the text [[which is formatted "Department of [Name of Discipline]" or "[Name of Degree] in [Name of Discipline]].
- Icons/text: this appears below the hero image. You can choose the icons and the text that appears below the icons. At a glance, this section shares information that research shows is exceptionally important to prospective and current students.
The text should be very brief [no more than 20 characters for the bolded text and no more than 60 for the unbolded text] yet impactful. Longer text will disrupt the layout, especially on mobile. We can work with you on this. You also have the option of adding a "Learn More" link so users can click for additional information.
- Highlights: this appears below the icons/text. This section showcases what's compelling about your program for both current and prospective students and aligns with an important strategic goal: student recruitment and retention. The only fixed item in this section is the link to Admissions on the far right. For the others, you can choose the links, images and very brief subtitles (no more than 20 characters) and descriptions (no more than 75 characters). This might include:
- link to success stories about student/alum majors
- link to internships related to the major/minor
- link to info on career paths
- link to scholarships & fellowships related to the major/minor
- link to new or interesting courses offered by the department
- link to news and/or events
- Resources: this appears below the highlights section. This is the spot for practical, task-oriented links to content largely for current students. This might include:
- link to major/minor requirements
- link to advisement resources
- link to FAQ
- link to faculty profiles/contact info
- link to staff contact info
- Optional section: this appears below the resource section. It allows you to link to more content if necessary and delete if not. You can choose the image, subtitles and links. If the format doesn't work well with your optional content, please contact Kira Poplowski to discuss options.
- Contact us: this appears below the optional section. Users expect to scroll to the bottom of a page to find it, so it should remain there. Keep the content brief: one department email address, one department phone number and one department location.
All pages are reviewed before they are incorporated into the site. When your pages are finalized, please indicate that they're ready for review by adding "yes" to column E on tab 4 here.
We can collaborate with you on strategy to organization to layout to step-by-step implementation. We're here to help. Please email
Anh Phan, Web Assistant
Kira Poplowski, Chief Communications Officer
If you had a profile on the old website, it was migrated to the new website. If you're not sure, please go to your department landing page, scroll down until the left-hand navigation appears and click "Faculty."
To edit an existing profile:
- Click on this link: https://new.jjay.cuny.edu/user/login
- Enter your John Jay credentials [email & password]
- Click "Single Sign-On"
- Wait for a confirmation email [typically within two working days] and follow the instructions on how to edit your existing profile. Please do not create a new profile. Creating a new profile instead of editing an existing profile will create a duplicate profile.
If you did not have a profile on the old website, you can create one. To create a new profile:
- Click on this link: https://new.jjay.cuny.edu/user/login
- Enter your John Jay credentials [email & password]
- Click "Single Sign-On" and follow the prompts
- Click "Workbench" on upper left
- Click "Create content"
- Click "Faculty Profile"
- Add content to your profile page
- When you're finished, scroll to the bottom of the page and click "Save"
Please contact Anh Phan if you need assistance.
We can collaborate with you on strategy to organization to layout to step-by-step implementation. We're here to help. Please email
Anh Phan, Web Assistant
Kira Poplowski, Chief Communications Officer